Quick start
Flash a system image to T-Display-CM0 in this order: Download the image → Connect through USB or a TF card reader → Write with Raspberry Pi Imager → Start the device.
| Method | Connection | Required tools |
|---|---|---|
| Flash through USB | Leave the TF card in the device and expose its storage to the computer over USB | USB data cable, rpiboot, Raspberry Pi Imager |
| Flash a TF card | Remove the TF card and connect it to the computer through a card reader | TF card reader, Raspberry Pi Imager |
T-Display-CM0 uses a TF / microSD card for system storage; CM0 Lite has no onboard eMMC. Choose either connection method, then follow the shared Imager steps below.
Download the system image
Use the T-Display-CM0 system image below for this tutorial. Both USB and TF card flashing use the same file.
Download the T-Display-CM0 system image (ZIP)
Filename: image_2026-11-03-t-displaycm0-lite.zip.
After downloading, select this ZIP file directly with Use custom in Raspberry Pi Imager. You do not need to extract it. The screenshots below use this same image.
Before flashing
- System image: Download the system image provided above and make sure the ZIP file is fully saved on your computer.
- TF card: Use a card large enough for the extracted image, with additional space for applications and saved files.
- Flashing software: Install Raspberry Pi Imager on your computer. Both the USB and card-reader methods use it to write the image.
- Power and connection: Prepare a stable 5 V power supply. For USB flashing, use a cable that supports data transfer and connect it to the device's Type-C port used for USB flashing.
Writing the image erases the target card
Back up any files you want to keep. Before writing, check the target storage device's name and capacity to avoid selecting your computer's drive or another removable device. Keep the power and connection stable during writing and verification.
Use the complete image provided for this tutorial
The image above includes LILYGO UI and board support. After writing and verification, follow the startup instructions below. You do not need to manually copy bootfs deployment resources or run an additional first-boot script.
Flash through USB
USB flashing requires running rpiboot first. Leave the TF card in the device and connect a USB data cable so the computer can access the system card, then continue to the shared Imager steps.
Prepare rpiboot
Follow the official Raspberry Pi usbboot instructions to install or build rpiboot for your computer, and prepare the accompanying mass-storage-gadget boot files. Run the command below from the usbboot directory. See the relevant sections of that repository for your operating system's dependencies and driver installation instructions.
Enter USB flashing mode
Make sure the TF card is inserted. Shut down the device and wait about 10 seconds.
Connect the computer to a Type-C port on the device with a USB data cable that supports data transfer; follow the port markings on the board.
Hold BOOT and, while keeping it pressed, hold POWER for about 1 second.
Run the following command in your computer's terminal:
bashsudo ./rpiboot -d mass-storage-gadgetWait about 5 seconds, until the computer detects the device's USB mass-storage device.
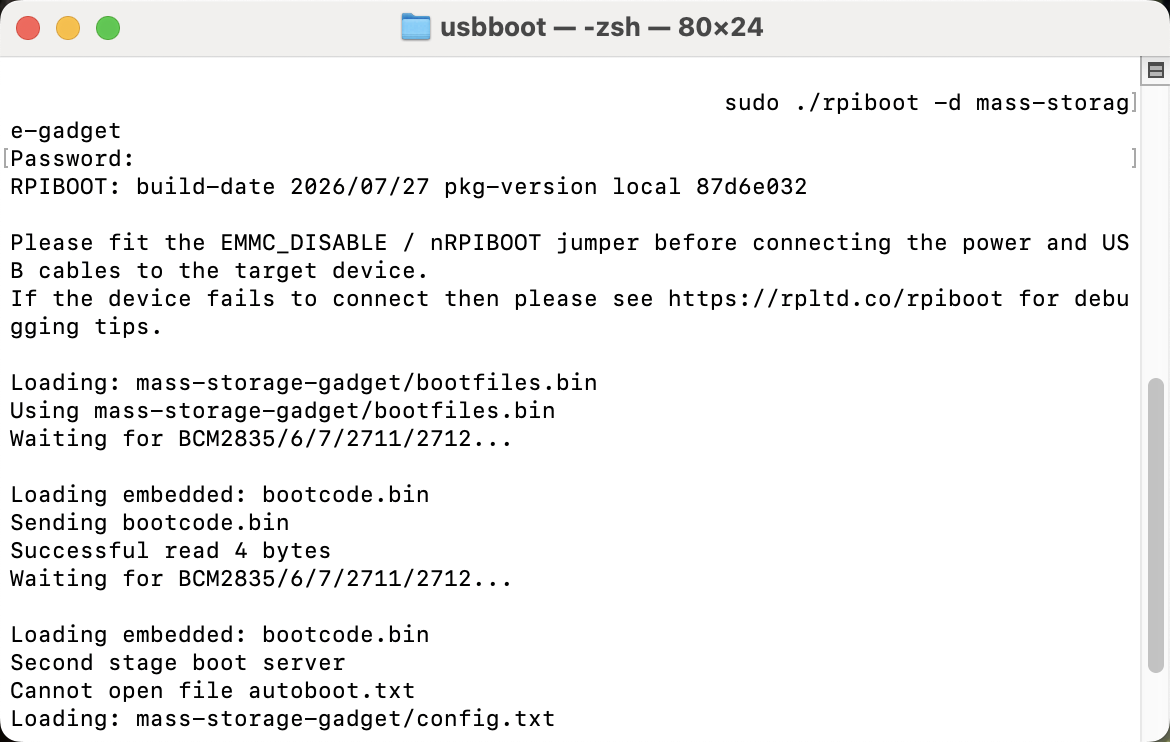
Once the computer detects the storage device, continue to Write with Raspberry Pi Imager.
Flash a TF card
Remove the TF card and connect it through a card reader to write the image with Raspberry Pi Imager on your computer.
- Shut down T-Display-CM0 and remove the TF card.
- Insert the TF card into the card reader, then connect the reader to your computer.
- Make sure the computer detects the TF card, then follow the shared Imager steps below. This method does not require running
rpibootor pressing BOOT.
Write with Raspberry Pi Imager (both methods)
After connecting through USB or a card reader, follow these six steps. The screenshots show Raspberry Pi Imager v2.0.10 on macOS with the interface set to Chinese; layouts and button labels may differ slightly in other versions. The image in the screenshots matches the download above. Storage device names and capacities are examples; check the TF card you connected.
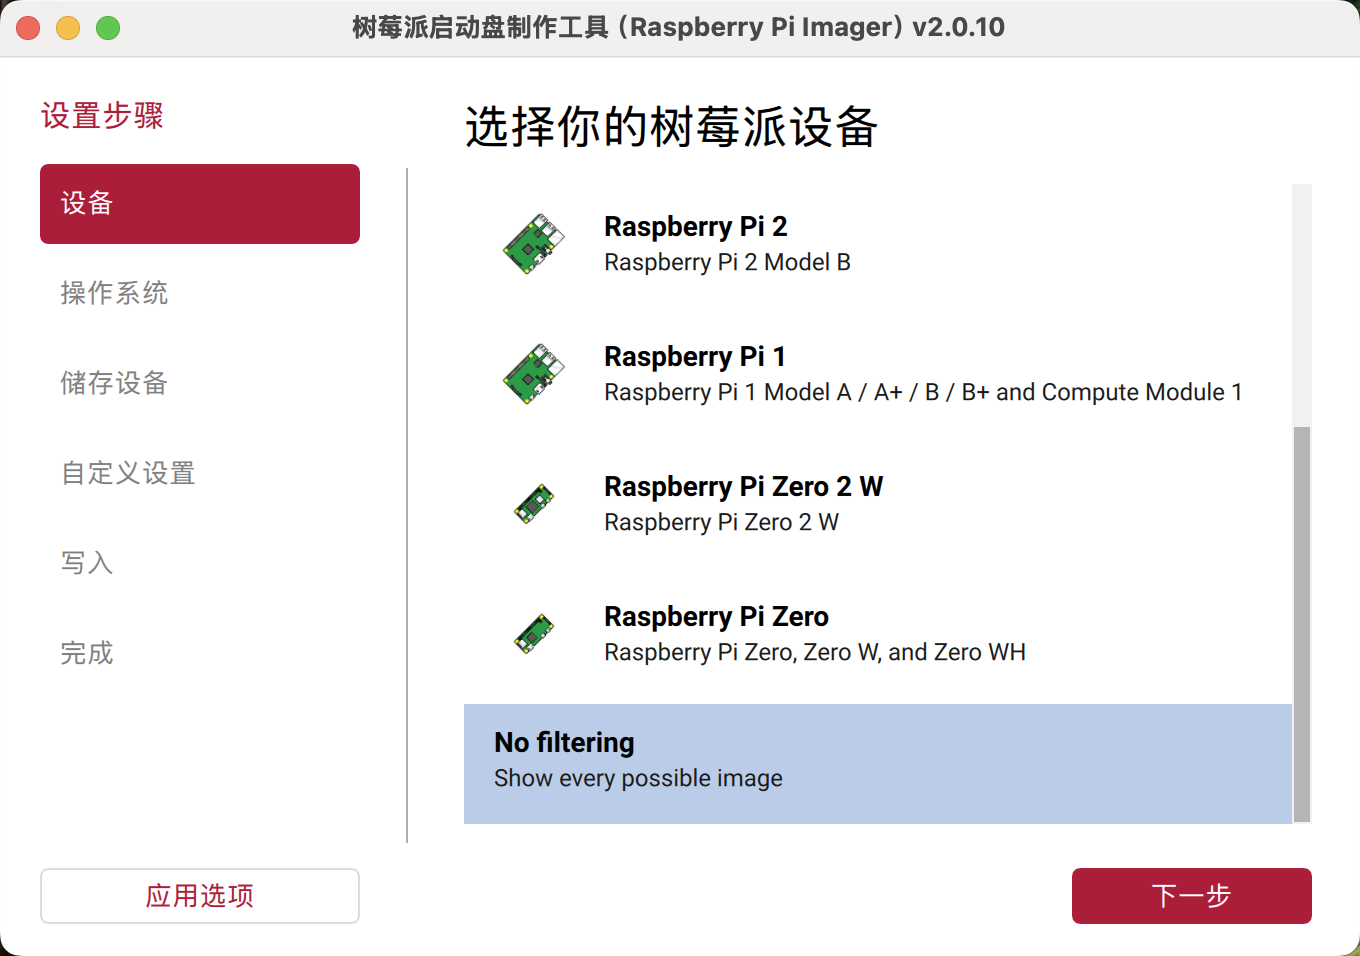
1. Select No filtering
Open Raspberry Pi Imager, select No filtering at the bottom of the device list, then click Next.
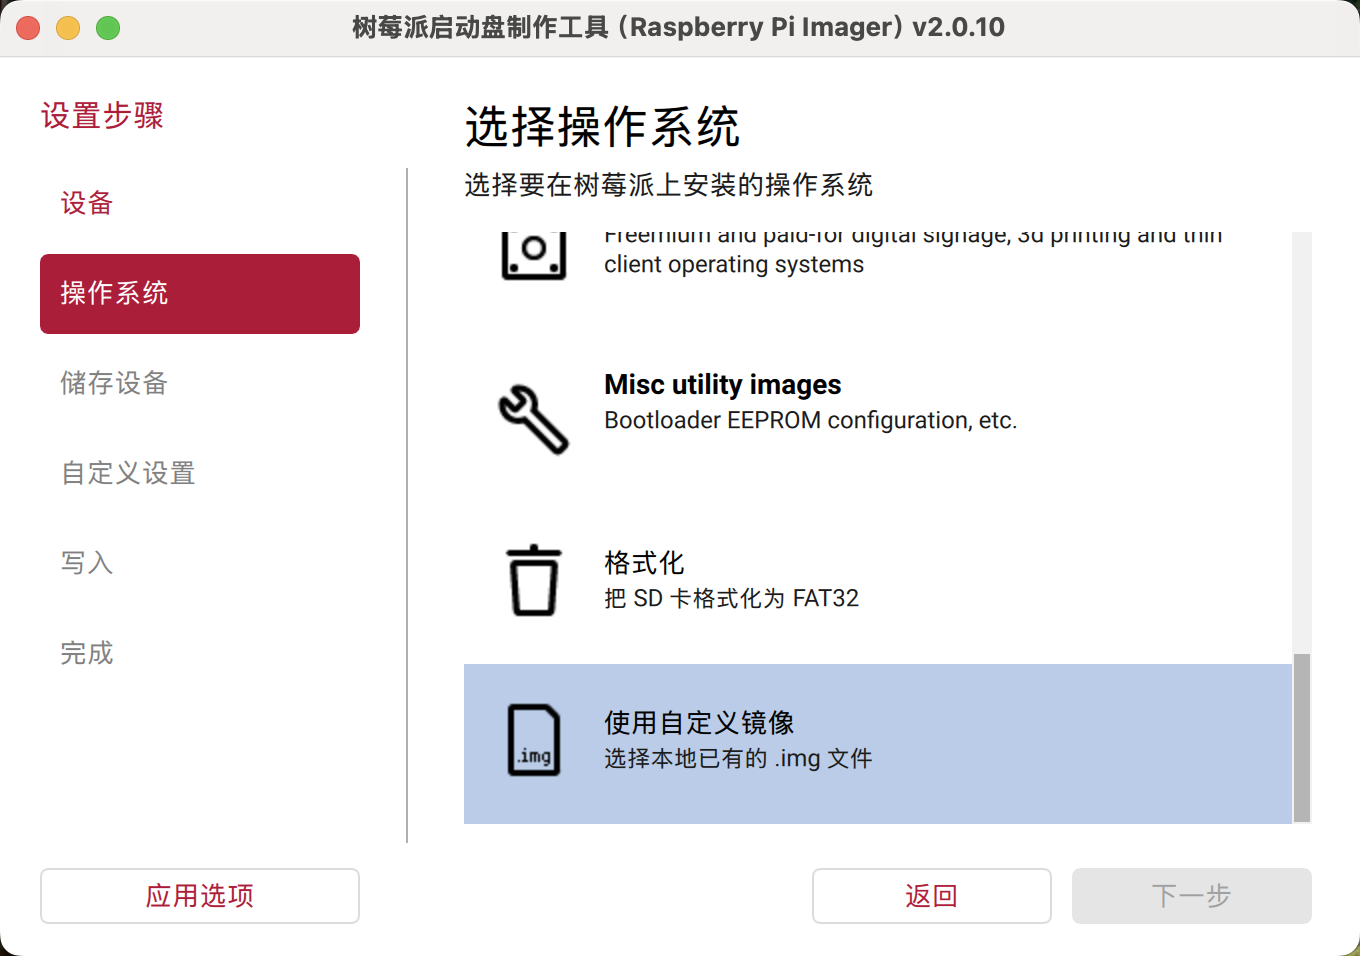
2. Select a custom image
At the bottom of the operating system list, click Use custom and select the image you downloaded above: image_2026-11-03-t-displaycm0-lite.zip. Select the ZIP file directly; no extraction is required.
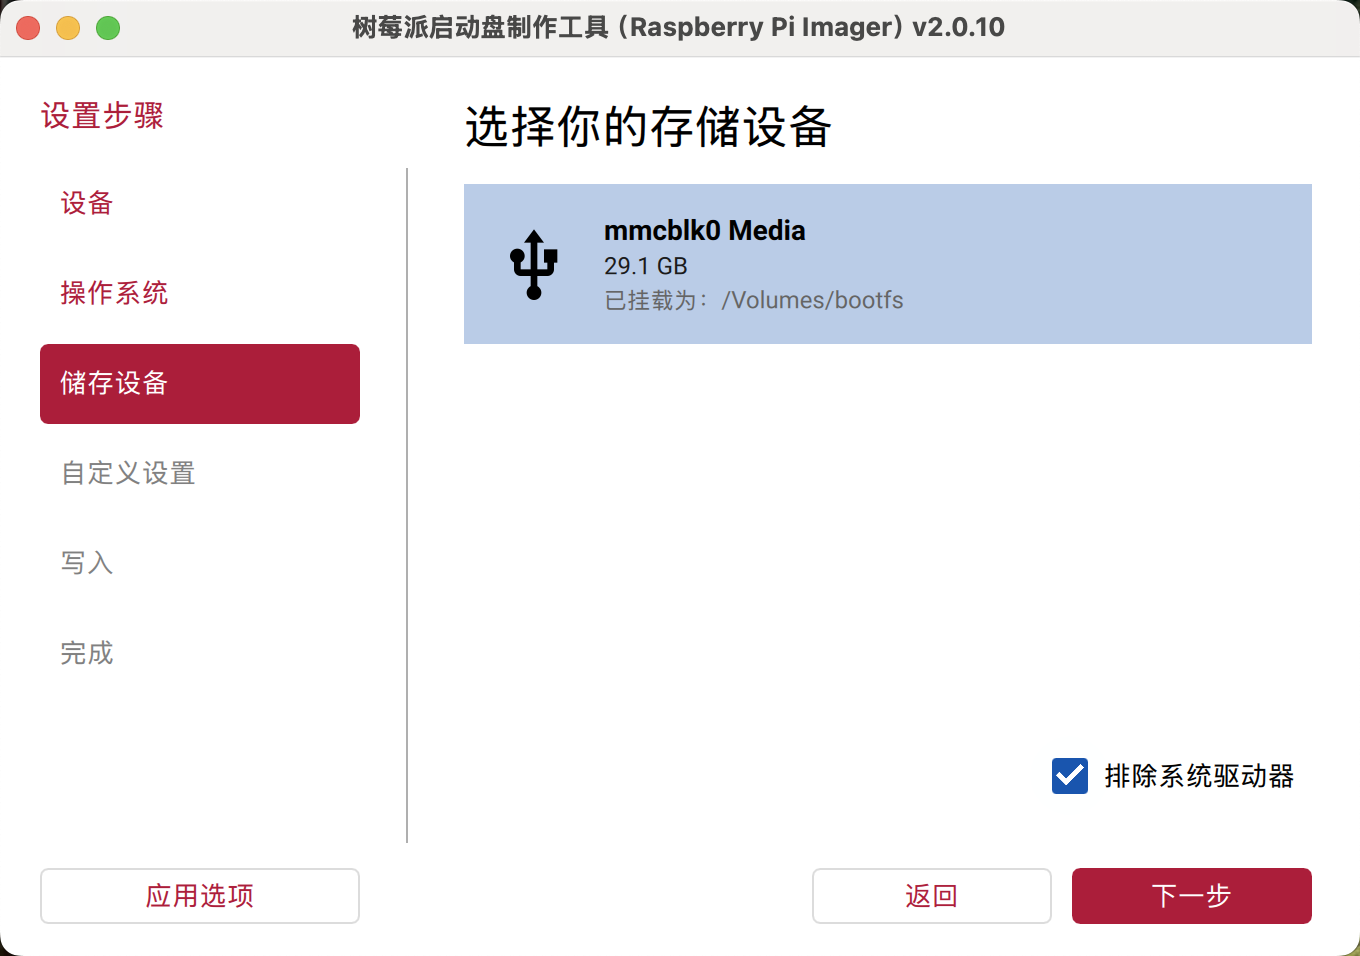
3. Select the target storage device
Select the TF card you want to write to and check its name and capacity. Keep Exclude system drives selected, then click Next.
| Connection method | Storage device to select |
|---|---|
| USB | The device storage that appears after running rpiboot. In the screenshot, it is mmcblk0 Media with a capacity of 29.1 GB. |
| TF card reader | The TF card in the reader. It may appear under the card reader model or the SD card name. |
If customization options appear, follow the instructions supplied with the image. If there are no additional requirements, skip them to preserve the image's defaults.
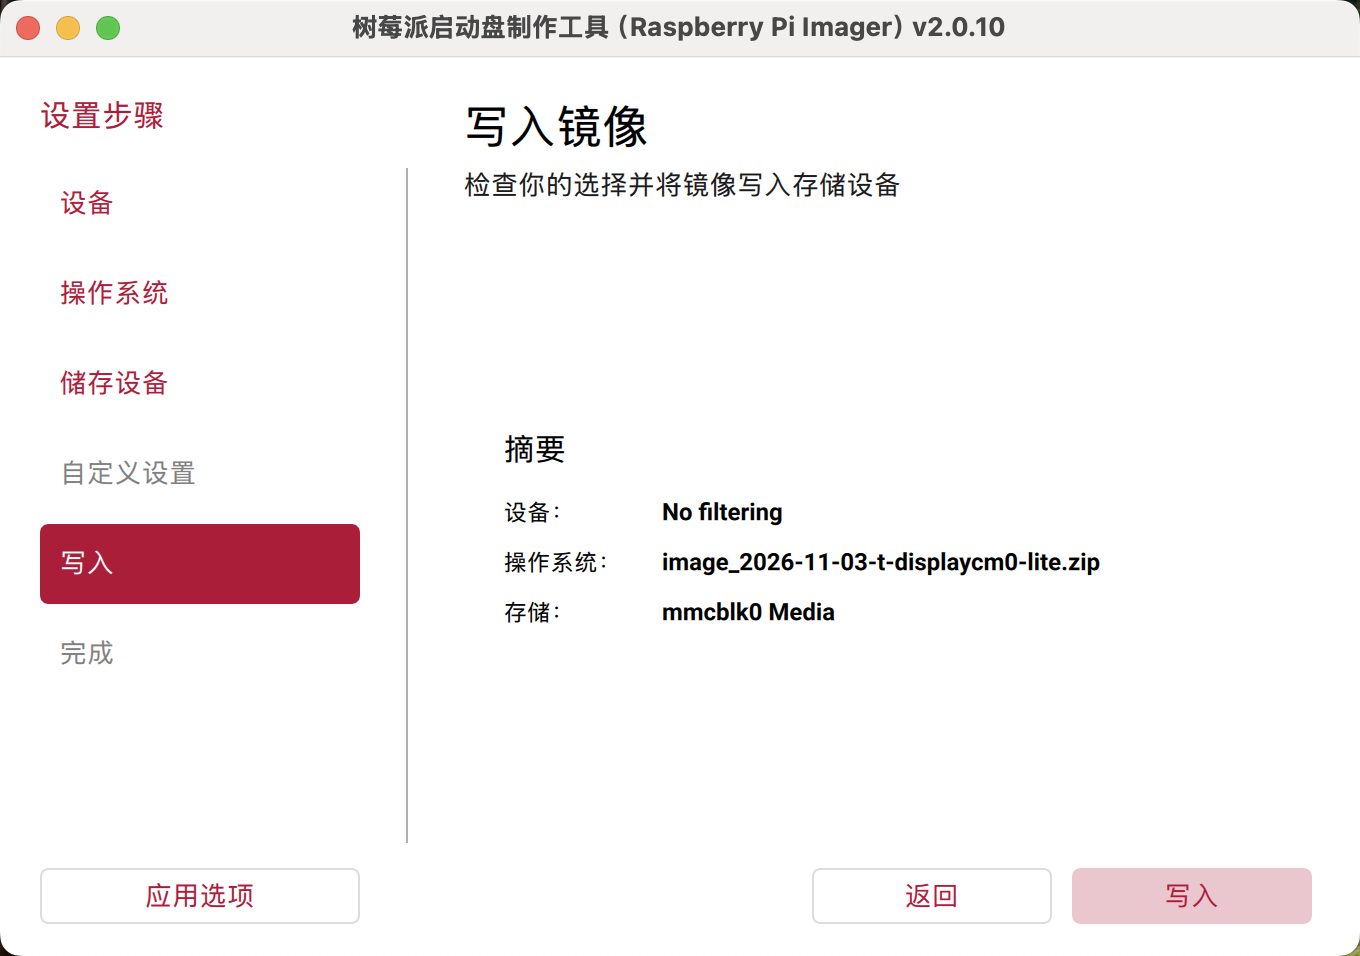
4. Review the summary and write
On the write screen, confirm that the operating system image is image_2026-11-03-t-displaycm0-lite.zip and check the target storage device again. Click Write once they are correct. If a prompt asks you to confirm erasing data, check the target card again before confirming.
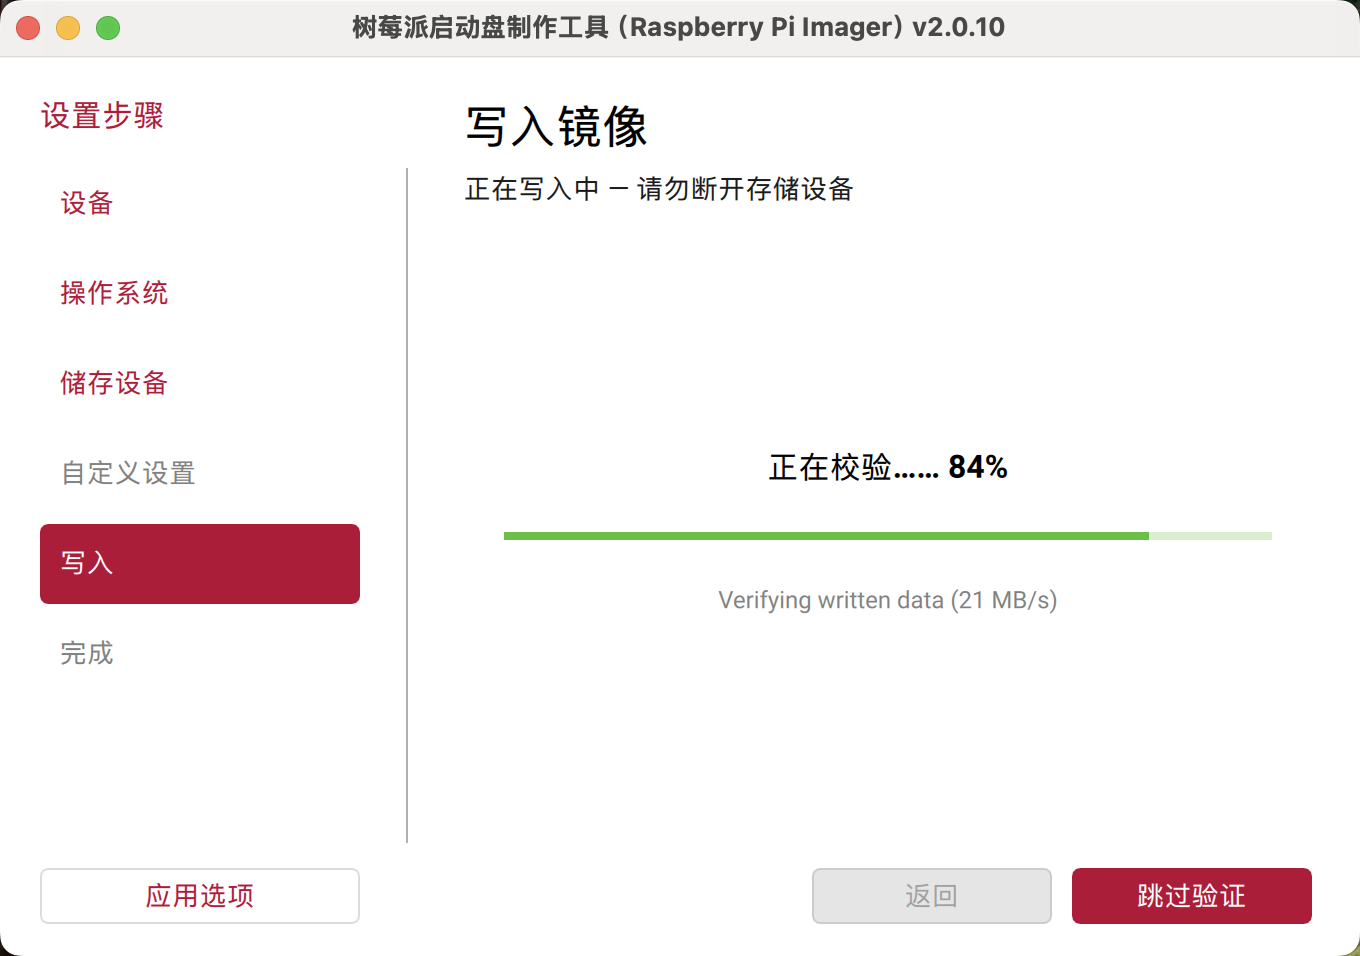
5. Wait for writing and verification
Keep the USB or card reader connection and device power stable. Wait for writing to finish, then let verification complete. The screenshot below shows verification at 84%, so it is not yet safe to remove the device. Wait for verification to finish; do not click Skip verification.
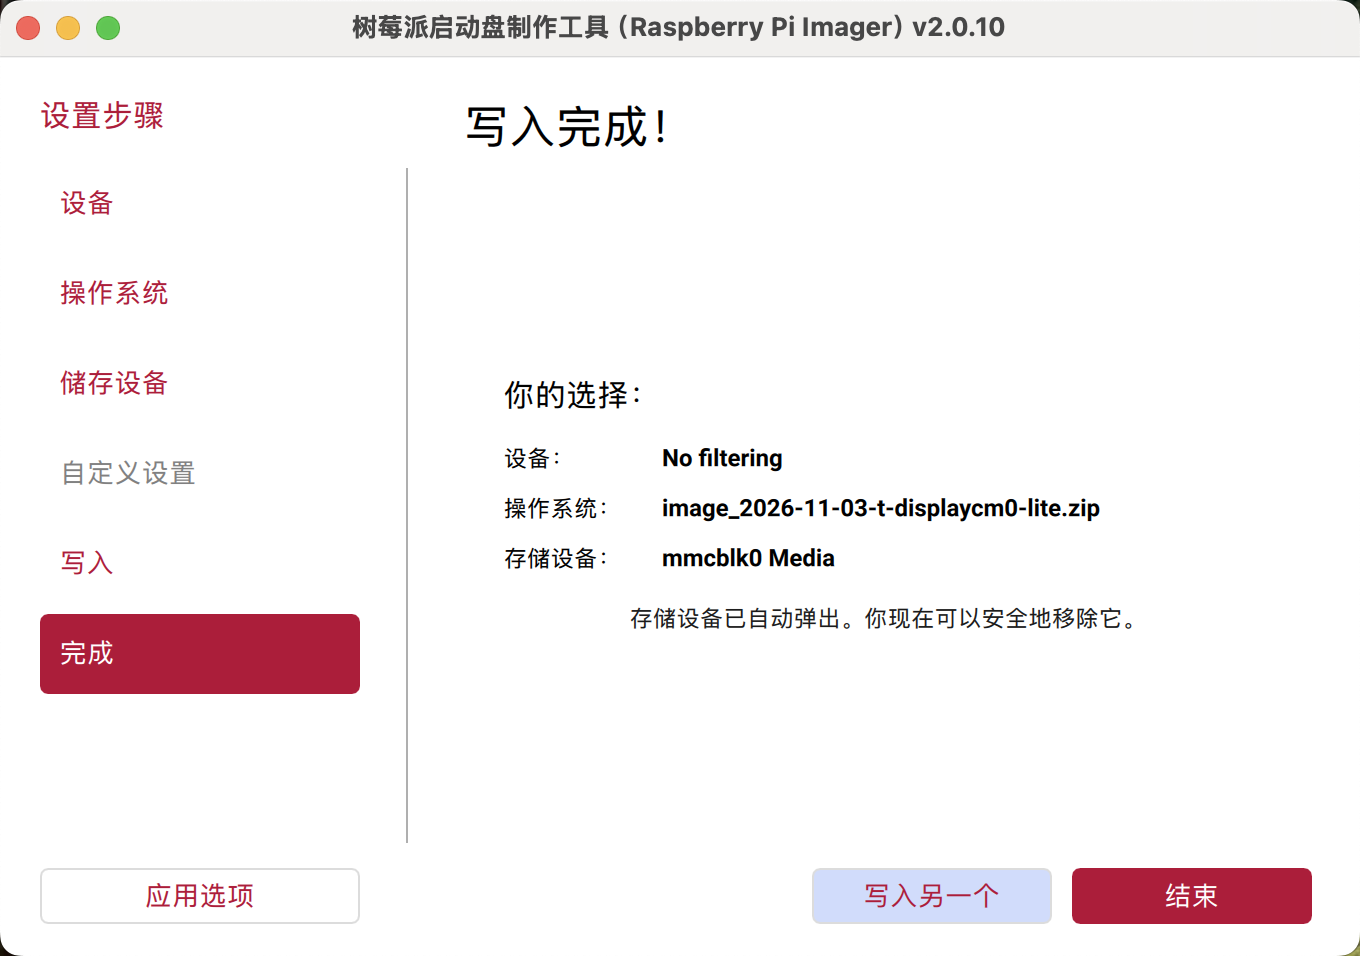
6. Finish and safely remove the storage
When the completion screen appears, check whether it says the storage device has been automatically ejected. If so, you can safely remove it. Otherwise, safely eject it from your computer first.
- USB: Shut down T-Display-CM0 and disconnect the USB connection used for flashing. Leave the TF card in the device.
- TF card reader: Remove the TF card from the reader and insert it into the powered-off T-Display-CM0.
Continue to First boot. A complete LILYGO UI image does not require manually copying deployment resources afterward. If your computer asks to format an unrecognized partition, cancel the prompt.
First boot
- Make sure the TF card is inserted and BOOT is released.
- Connect a stable 5 V power supply, then hold POWER for about 1 second to turn on the device.
- Wait for the initial system setup to finish and keep the power connected. If the image includes a setup wizard, follow the on-screen instructions for region, account, and network settings. If an account is already configured, sign in as described in the image's instructions.
- Once Launcher opens, use Settings to connect to Wi-Fi, then open Store to install applications.
Troubleshooting
| Symptom | What to check |
|---|---|
| The computer does not detect storage during USB flashing | Check that the TF card is inserted, the USB cable supports data transfer, and the correct port is connected. Shut down, wait about 10 seconds, repeat the BOOT + POWER sequence, and check the rpiboot output. |
rpiboot reports that the program or boot directory cannot be found | Make sure installation or compilation is complete. Run it from the directory containing rpiboot and mass-storage-gadget, or adjust the paths to match their installed locations. |
| Imager fails to write or verify the image | Check the TF card's capacity, the card reader or USB connection, power, and the image file's integrity. If necessary, try another card or cable. |
| The device does not start correctly after flashing | Make sure you used the system image provided on this page, writing and verification succeeded, the TF card is inserted, and BOOT is released. Also check the 5 V power supply. |
User documentation · Developer documentation · Documentation center